


Table of contents
In this tutorial, I will show you how easy it is to get your website available on the internet to the whole world using Spheron. If you haven't signup for free please click here to signup
About Spheron
Spheron is a #nocode platform that helps you automate web projects, and DAPPs on the blockchain (decentralised way). You can deploy your application without any worries or any annoying coding stress and configuration.
Spheron Features
Configure builds
Spheron helps you run the build command each time you push an update to your repository. You can also choose to auto-deploy or not when making your deployment settings
Domain & HTTPS
A domain name is the URL anyone types into the browser to visit your site. You can assign a custom domain if you have already purchased one.
Sub Domain
A subdomain name is a piece of additional information added to the beginning of a website domain name. It allows you to organise different content for specific reasons
Always Live
Your website is been launched on blockchain technology so it can never go down unless the world is shutting down.
Deploying on Spheron
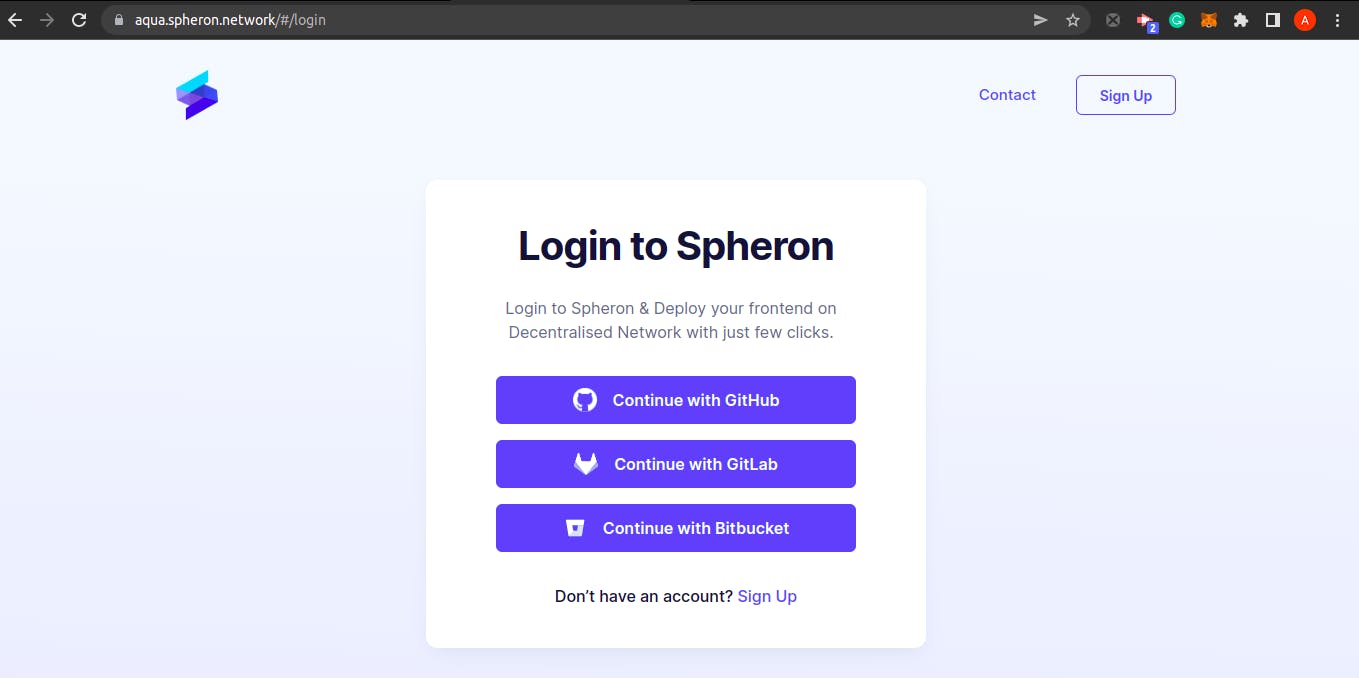
Step 1: Login/Signup
If you are new user signup (its free)😃 Spheronians just login
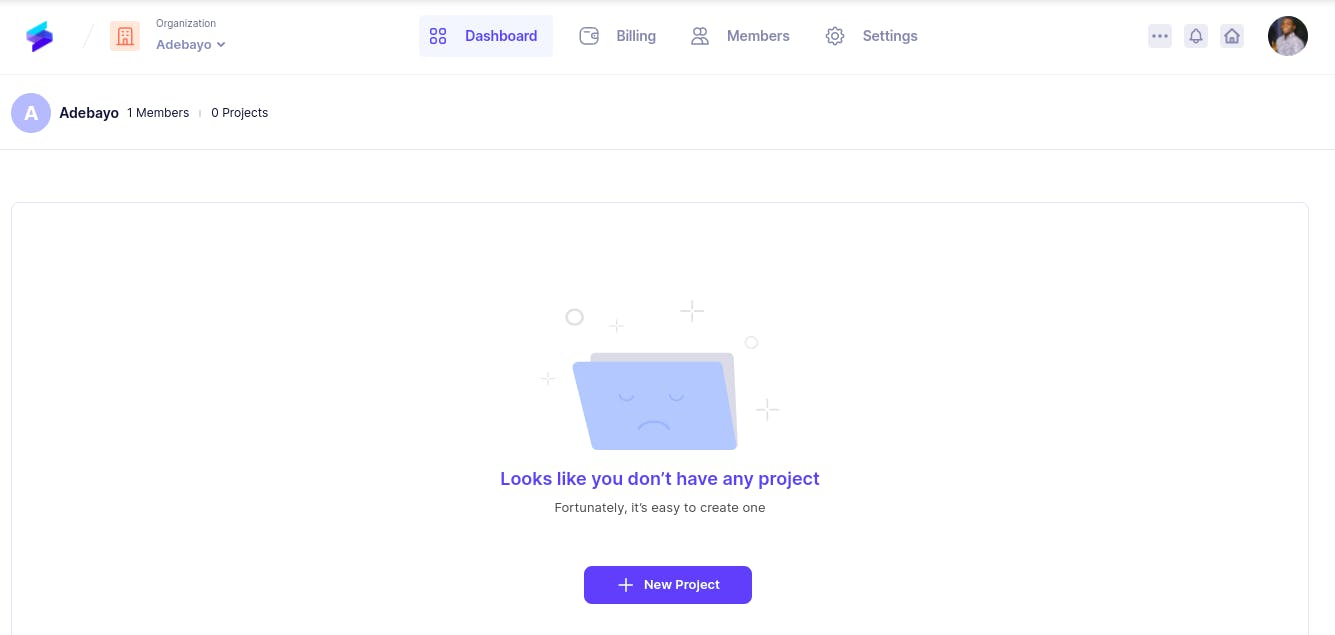
Step 2: Link your project repository
As shown below, Once you have logged in click on the New Project button to connect to your project.
Step 3: Connect to your Git provider
Clicking on the New Project button will take you to this new page
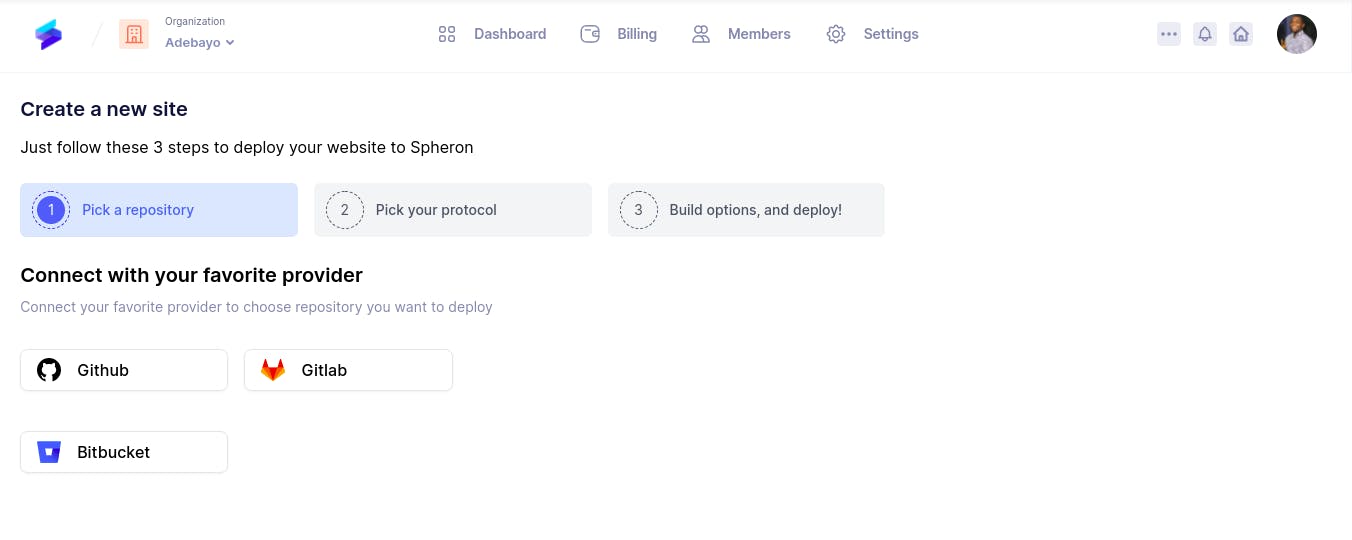
As seen above, the next step is to choose your git provider your website source code is hosted.
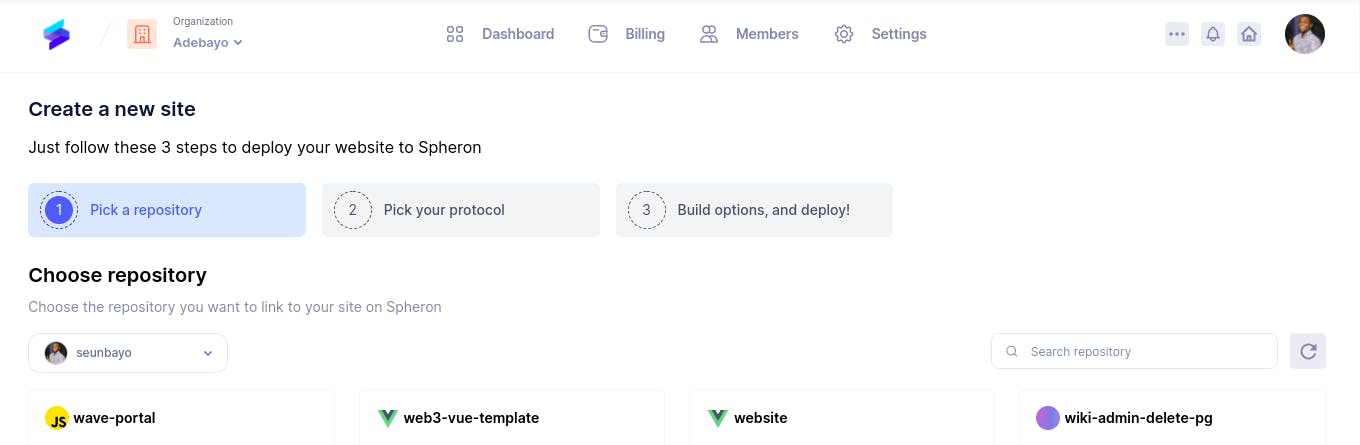
Step 4: Select your Repository
After choosing your favourite git provider, the next step is to select your website repository as shown below. If you have just one repository it only displays just one.
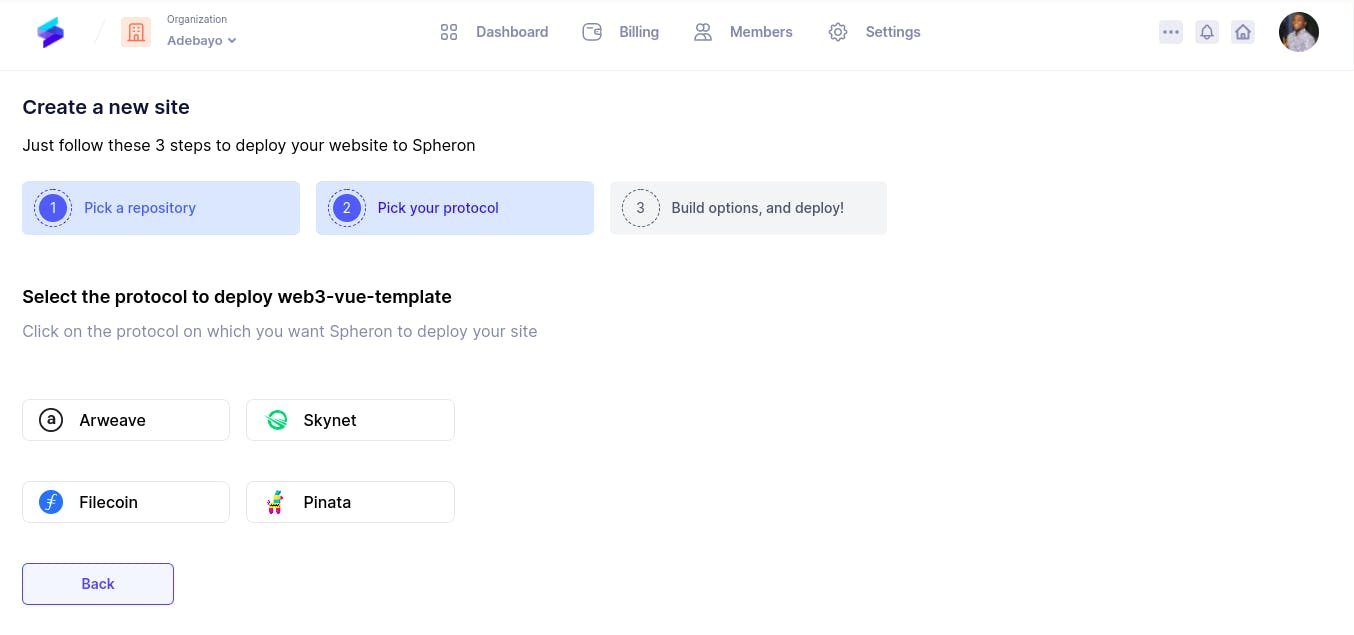
Step 5: Select your most preferred Protocol
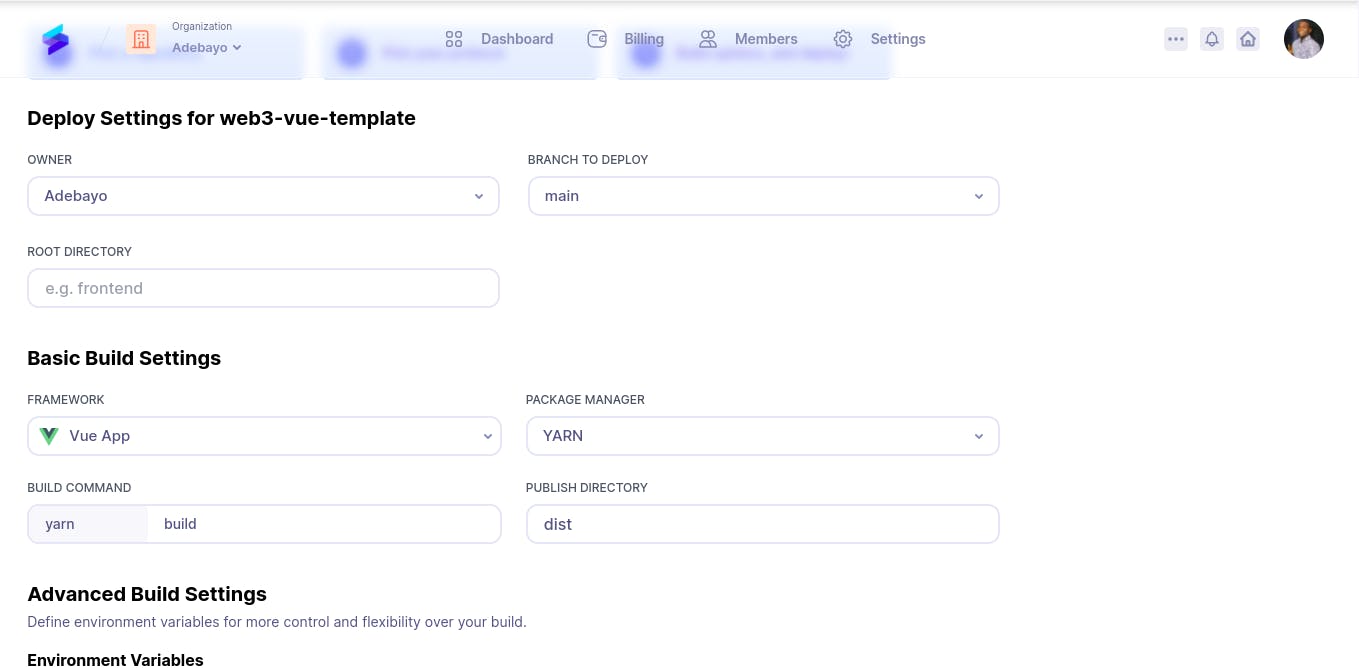
Step 6: Configure your settings
Here you can configure your options. Make sure your publish directory is where your public site files are placed after building the site. Spheron automatically helps you add your basic build settings🎖️. Then click the Deploy button to continue.
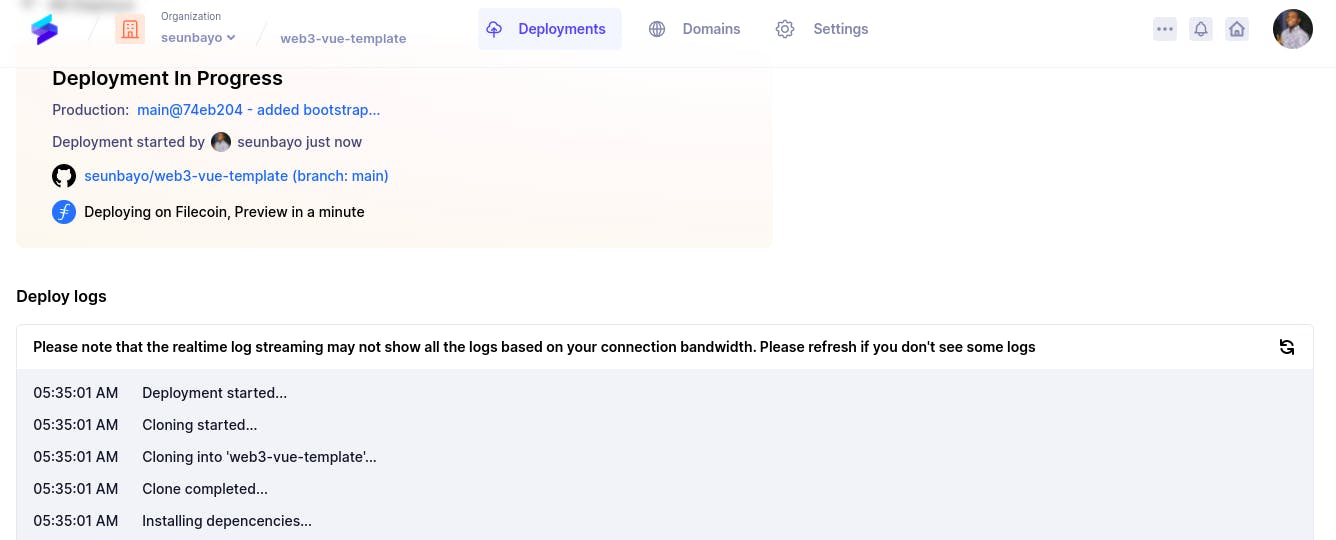
Step 7: Wait!
🎶Sit back and enjoy watching Spheron do the work. It will only take a few seconds🎵
Step 8: You are Done
⌛At this stage your build is complete and your website is Live!
PS. Spheron automatically generated a name for your site so you do not need to worry about it. Congratulations on your new website is Live!!
I hope you found this helpful✌️ ✌️ ✌️.
Reach out to me on Twitter if you have any roadblocks